You can search very easily in Primo. Just type one or more words you are looking for and click the Search button.
Once you are familiar with the basic Primo search, you might want to try doing more with the Search panel or use the Advanced Search option. Both of these options offer numerous features for making your searches more precise and enable you to get results that are more useful.
You can do more than just a simple search with the Search panel. Try the following search options to get the best results for your search:
To search for a phrase, type quotation marks around the phrase. You can combine both words and phrases in your search.
You can search for items that contain at least one of the words or phrases you type in the Search box. To do so, type OR between the words or phrases.
For example, to search for items with the word Irish or the word Celtic, type the following in the search box:
You can exclude items that contain specific words or phrases. To do so, type NOT and then type the word or phrase to exclude.
For example, to search for items with the word Celtic and exclude any of these items with the word Irish, type the following in the search box:
|
|
?—enter a question mark to perform a single character wildcard search. For example, type wom?n to search for records that contain the strings woman, women, and so forth.
|
|
|
*—enter and asterisk to perform a multiple character wildcard search. For example, type cultur* to search for records that contain strings, such as culture, cultural, and culturally.
|
You can use parentheses to group terms within a query. For example, to search for Shakespeare and either tragedy or sonnet, type the following in the search box:
The search scope defines where the system should perform the search. A default search scope is predefined based on your login, usually corresponding to your major field of study or some other criteria set up by the institution. However, you can change the scope of your search by selecting a search scope from the drop-down list as shown in the following example.
The Selected Databases scope allows you to search remote databases that you have selected using the Find Databases feature. For information on selecting remote databases, see Selecting Databases.
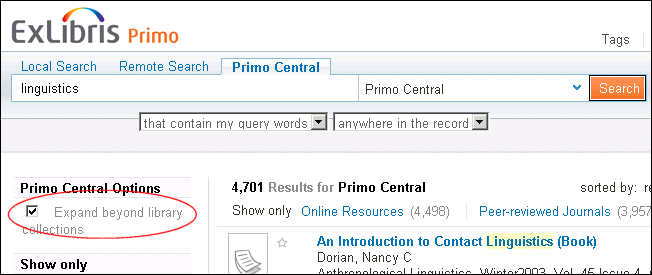
Primo Central is a centralized search index that encompasses tens of millions of records of global or regional significance that are harvested from primary and secondary publishers and aggregators. To search from these resources, select the Primo Central search scope or a search scope that includes it.
If you want to receive results for Primo Central items that do not contain full text, select the Expand beyond library collections check box.
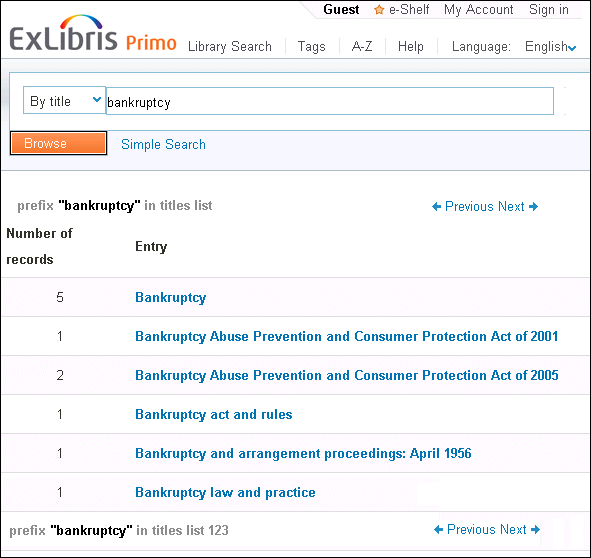
The Browse search allows you to browse library material (local material only) in order to find information of relevance quickly. You can browse material by author, title, and subject. In the results, you can click an underlined entry to see its associated records. It is also possible to browse by call number, which returns a list of associated records in brief format. Clicking a title displays its full record.
To access Browse, click the Browse Search link next to the simple search box, as shown below.
|
|
Set preferences for your current and future sessions. You can set your preferences so that they reflect the way you usually search, and save them for future sessions.
|
|
|
Add items you found and queries you submitted permanently to your basket. You can save items from your results list to your basket and you can save queries that you have performed for future use.
|
|
|
Set alerts for your queries. You can set a query to become an alert, that is, to run automatically and send you email notification once it locates new items answering your search criteria.
|
|
|
Access external licensed resources. The institution offers licensed information resources to its users. Once you sign in, you can search and retrieve items from these additional resources.
|
|
|
Use library services. You can benefit from library services such as requesting or recalling items.
|
|
|
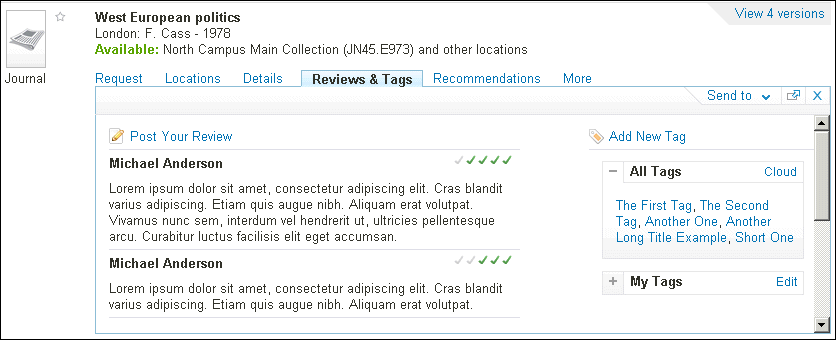
Tag and review items. You can assign words or phrases to items to help you organize and locate items later. Since tags are made public, other users can view your tags and use them. Additionally, you can review items to share your opinions with others.
|
You should sign out of Primo so that your searches remain private and your personal settings and basket are not tampered with by anyone else.
My Account enables you to view the contents of your library card and perform library services, such as renewing a book or canceling a request. In addition, it lets you define your personal Primo settings. To access My Account, click the My Account link, which appears at the top of each page in Primo.
You can tailor the Primo user interface so that it reflects the way you usually search. For example, you can specify the default language, the maximum numbers of search results per page, your default e-mail address, and your cell phone number. To set your preferences, click the Personal Settings option on the left side of My Account.
e-Shelf allows you to save and organize items that you find during your Primo session. To access e-Shelf, click the e-Shelf link at the top of the page.
When you select the Star icon for an item in the search results, the system highlights the icon and adds the item to the Basket folder in e-Shelf.
To remove an item and all of its copies in the various folders in e-Shelf, select the highlighted Star icon next to the item in the search results.
If you do not want to delete all copies of an item in e-Shelf, you must remove each copy directly from e-Shelf. For more information on removing items from e-Shelf, see Managing Items.
To view items that are saved in e-Shelf, click the Basket folder or any of its subfolders. From the list of items, click the item that you want to display.
|
Copy Folder—Click this button to copy the selected folder into memory. The original folder will not be changed or deleted.
|
|
|
Paste Folder—Click this button to paste the last folder placed into memory into the selected folder.
|
|
|
Cut Items—Click this button to cut the selected items and to place them into memory.
|
|
|
Paste Item—Click this button to paste the last items placed into memory into the current folder.
|
|
|
Save Items—Select an option (such as Push to Connotea) from the Save pull-down list and then click this button to save the selected items.
|
|
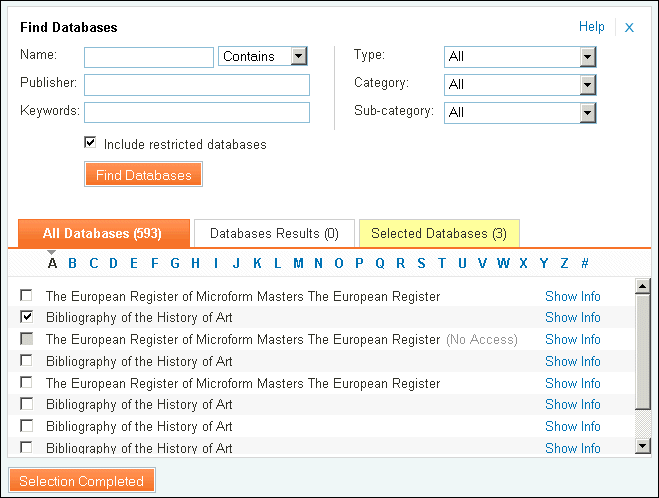
The Find Databases option enables you to search for specific remote databases and include these databases in Primo searches.
To display the Find Databases lightbox, click the Find Databases link, which appears at the top of each page and to the right of the Search Scope drop-down list on the Advanced Search page.
The All Databases tab displays all of the databases to which your institution has subscribed. If you would like to search for specific databases, fill in the relevant fields on the upper section of the lightbox and then click the Find Databases button. To display the results, click the Databases Results tab.
You can select databases from either the All Databases tab or the Databases Results tab (if you have performed a search). Databases that are marked as restricted cannot be searched, but can be linked to directly.
To select databases, select the check box next to each database that you want to include in Primo searches. As you select a database, it is added to the list of databases on the Selected Databases tab.
After you have completed your selections, click the Selection Completed button to exit the lightbox and to update the Selected Databases search scope. You will need to select this search scope to search the selected databases.
The Databases Results tab contains a list of all the databases that match the criteria you specified in the database search (see Searching for Databases)
The Selected Databases tab displays a list of all the databases that you have selected from either the All Databases tab or the Databases Results tab.
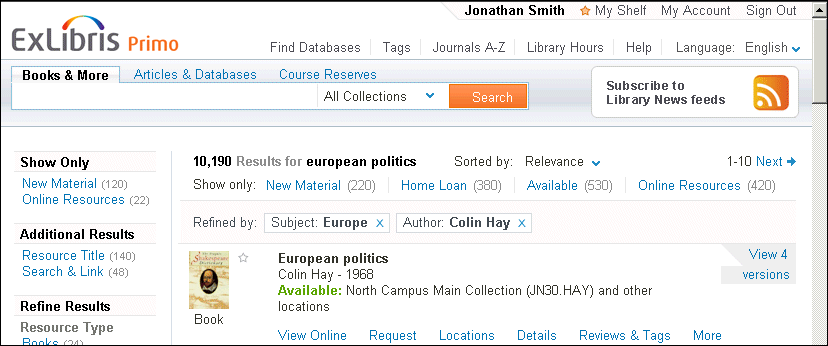
The Brief results display all the items that match your search query. For each item, the following information displays:
|
|
Title—Depending on your institution’s configuration, clicking the title displays either the item’s information or the online resource.
|
|
|
Star icon—click the Star icon next to the title to add or remove the item from your basket. A highlighted star indicates that you have already added it to your basket.
|
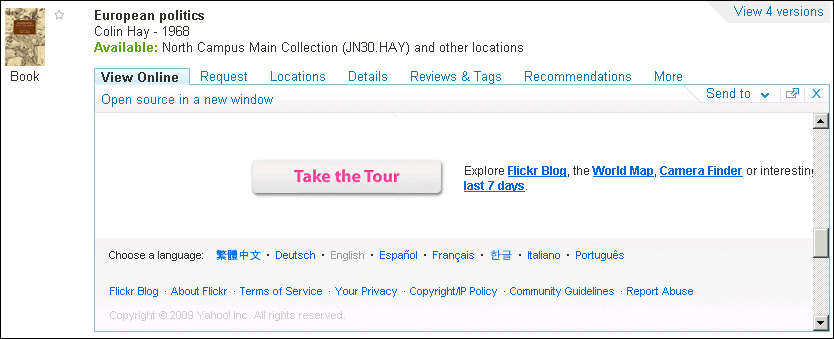
The View Online tab displays items that are available online inside the tab. If the item has multiple entries, click an entry to display the item on a new page.
The Request tab allows you to request physical items (such as books and audio CDs) from your institution. Depending on your institution, you may be able to request these items directly from Primo. Otherwise, this tab will link you to your institution to perform requests. Note that you may have to sign in to Primo or your institution to make a request.
The Locations tab lists all of the locations that hold this item. To get more information on the location that holds the item, click either the location link or the Plus icon.
The Recommendations tab displays additional items, which are based on searches that were performed by users that have also viewed this item.
A query is a word or phrase you specify in the search panel to request information. You can do the following with queries:
|
|
Activate alerts on your saved queries to have them run automatically at scheduled times to provide you with updated results from queries.
|
|
|
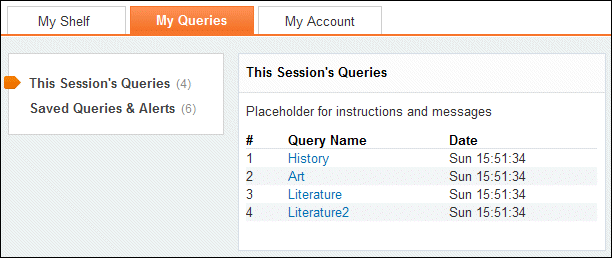
If you are signed in, you can save a query by clicking the Save Search link, which appears below the facets on the Brief Results page. You can access your saved and session queries by clicking either the e-Shelf or My Account link and then clicking the My Queries tab.
|
|
This Session's Queries—this folder lists all of the queries that you have performed in the current session.
|
|
|
Saved Queries & Alerts—this folder lists all of the queries and alerts that you have saved.
|
You can run a saved query yourself, or you can set it as an alert that runs automatically at scheduled times and sends you new results by e-mail.
An alert is a process that runs your query automatically at scheduled times and sends you new results via e-mail.
To view the list of alerts, click the Saved Queries & Alerts menu. To configure an alert for a saved query, click the Update link for that query and then specify the alert settings.
Syndicated content, otherwise known as Really Simple Syndication (RSS), is a popular way to distribute information from Web sites. For example, using RSS, a news site or a blog can automatically feed its news articles or entries to a group of subscribers.
RSS feeds in Primo are used to notify you of new items found by the query. RSS feeds can be activated from either the search results or the Saved Queries & Alerts folder on the My Queries tab. All that you need is to have an RSS reader installed on your computer.
If your browser supports RSS, click the RSS button. A window from which you can subscribe to the RSS feeds opens. Follow the instructions in the window.
If your browser does not support RSS, right-click the RSS button, copy the URL, and paste it into the RSS reader.
Tags are words or phrases that you can assign to items to help you organize and remember them. You share your tags with the community, enabling you to see the tags assigned to items by other users. In addition, tags you assign to items will also be available to the community. You can assign as many tags to an item as you like.
|
|
Cloud—An alphabetic list of tags where the size of the text reflects the popularity of the tag, that is, the number of items you or the community have assigned to this tag.
|
|
|
List—A list of the tags arranged in order of popularity, so that the most popular tag appears at the top of the list. The number of items that have been assigned this tag appears in parentheses to the right of the tag.
|
Click a tag to search for all items that have been assigned the tag. Using the Tagging panel, you can:
The tags you see are listed in order of popularity, with the most popular tag at the top of the list. You can see all the tags you are using, as well as everyone else's tags for this item.
When you assign a tag, keep in mind the following question, "What tags or words will help me remember this page a few months from now?" This is a good starting point for assigning tags. You do not have to rely on the designer of a system to provide you with an appropriate category. You make up tags as you need them, and use the tags that make the most sense to you.
|
|
Assign an existing tag to the current item. Select the box next to the tag you want to assign to the item or type the tag name into the Add or delete tags for this item area. You can check as many tags as you want. If you are typing the tag names into the Add or delete tags for this item area, type a comma between each tag name.
|
|
|
Assign a new tag to the current item. Type the name of the new tag in the Add or delete tags for this item area.
|
|
|
Remove your tag from the current item. Delete the tag in the Add or delete tags for this item area or uncheck the tag in the list of tags.
|
A list of tags is available in the Tags page, where they are arranged according to how recently they were assigned and their popularity. The most popular tag list can also be viewed as a cloud.
You can search for additional tags that do not appear on the Tags page by typing a search string in the Search for Tag area and then clicking GO.


